Productivity Hacks
Productivity Hacks

How to Transcribe Zoom Meetings with Otter.ai

Updated on:

How to Transcribe Zoom Meetings with Otter.ai
Article Breakdown

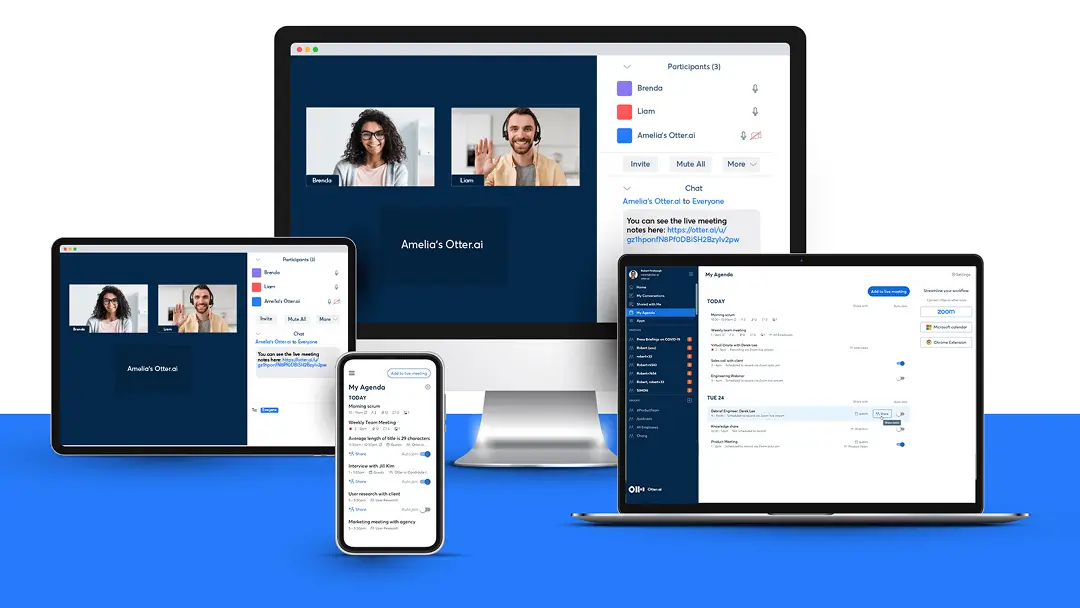
In the age of remote meetings, classes, and events, keeping track of meetings can be tricky. People struggle to keep up with the conversation while taking notes, and it’s absolutely important to capture the information and make it instantly available to everyone. Otter.ai offers multiple ways to instantly record and transcribe your Zoom meetings and collaborate with your team.

Otter.ai offers various Zoom integrations that eliminate the need to switch between apps. These integrations help you bring note-taking and other nuances in one place so you can recapture your focus and work more efficiently.

In this article, we will discuss three ways to transcribe Zoom meetings using Otter.ai.

Schedule a Free Consultation
Get the most out of your meetings for your company, contact a meeting expert today.

3 Ways to Transcribe Zoom Meetings with Otter.ai

Otter.ai offers three ways to transcribe your Zoom meetings. You can get your Zoom meeting transcription during or after the meeting.

  • Automatically transcribe Zoom meetings with Otter Assistant
  • Zoom cloud recordings transcription via Zoom sync
  • Otter.ai live transcription with Zoom

Automatically Transcribe Zoom Meetings with Otter Assistant

Otter Assistant automatically joins any Zoom meeting to record, transcribe, and share meeting notes. Unlike Otter Live Notes and Zoom sync, Otter Assistant works with the meetings hosted by anyone.

Otter Assistant is available on all plans. Paid plans can use Otter Assistant for concurrent meetings.

Steps to Transcribe Zoom Meetings with Otter Assistant

Step 1: Set Up Otter Assistant

Setup is quick and easy. First, log into Otter.ai. Next, Otter needs to sync your calendar events. On the right panel of your Home Feed, click Connect for each calendar app you use and sign in to allow Otter to access your calendar.

If you have connected your Google or Microsoft Outlook calendar to Otter, you can see your upcoming meetings. From the Calendar, you can directly join your meeting and also schedule Otter Assistant to join, and capture and share meeting notes with participants. Click through the tutorial tips to learn what you can do on this page.

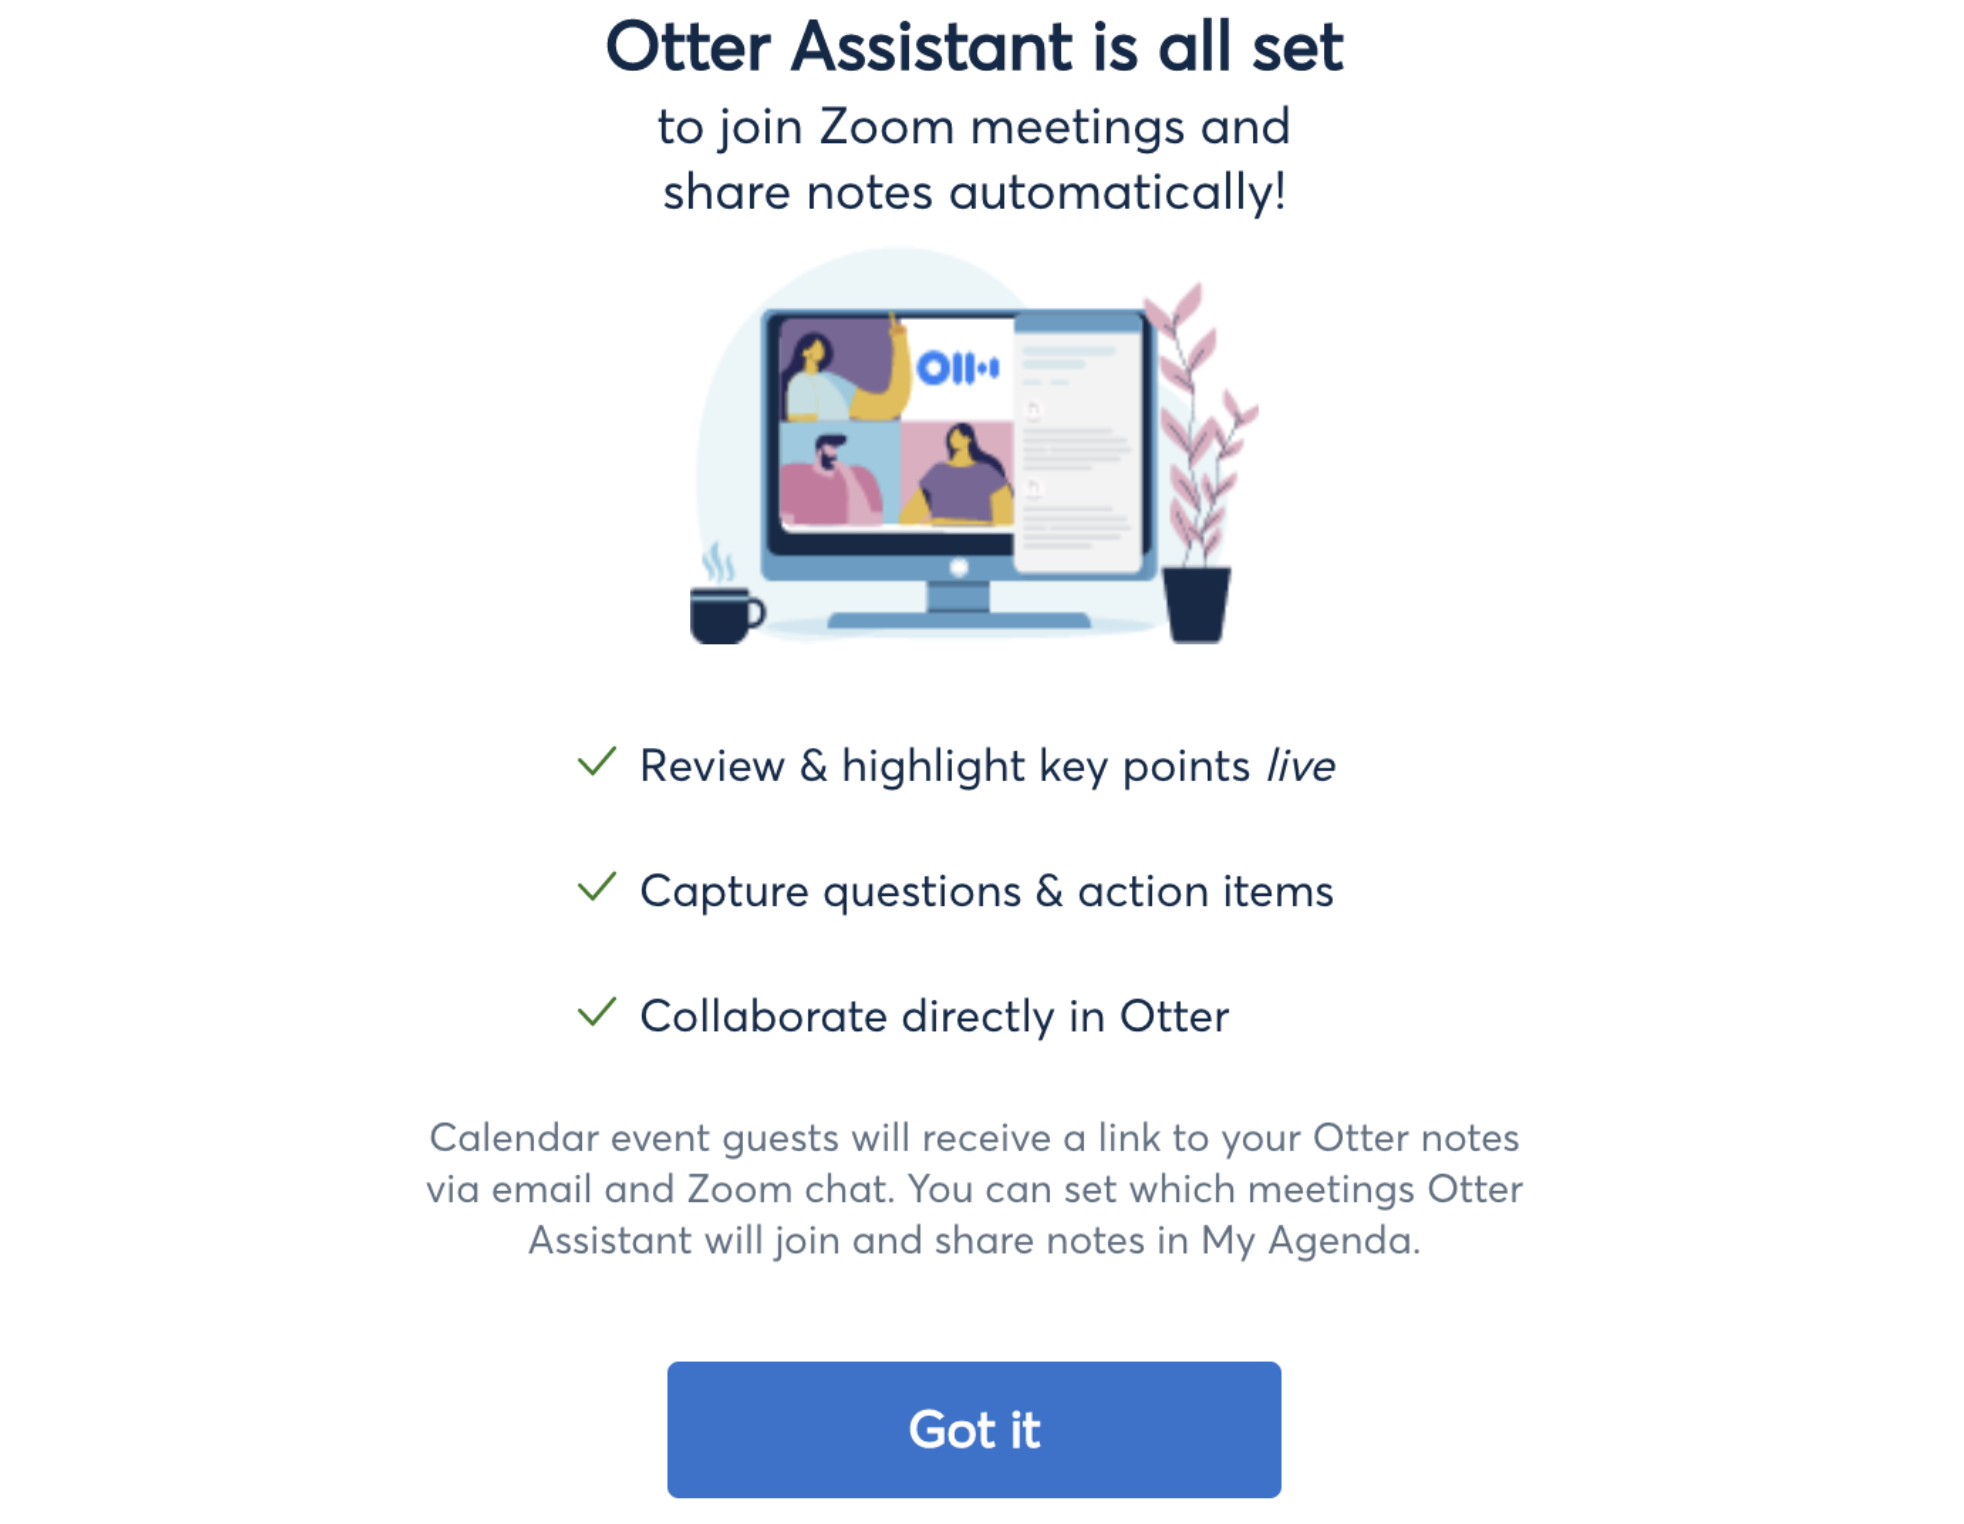
You are all set! Otter Assistant will join all Zoom meetings and share notes automatically. You have full control of which meetings Otter Assistant will join and share notes in your Calendar (see details below).
Step 2: Manage Otter Assistant for All Meetings

You can select and modify the default behavior of your Otter Assistant for all meetings in your Account Settings > Meetings tab.

  • Auto-join all or individual meetings.
  • Auto-share meeting notes to calendar event guests or share notes for only selected meetings.
  • Send Otter.ai links via chats to access notes conveniently.

Step 3: Manage Otter Assistant for Individual Meetings

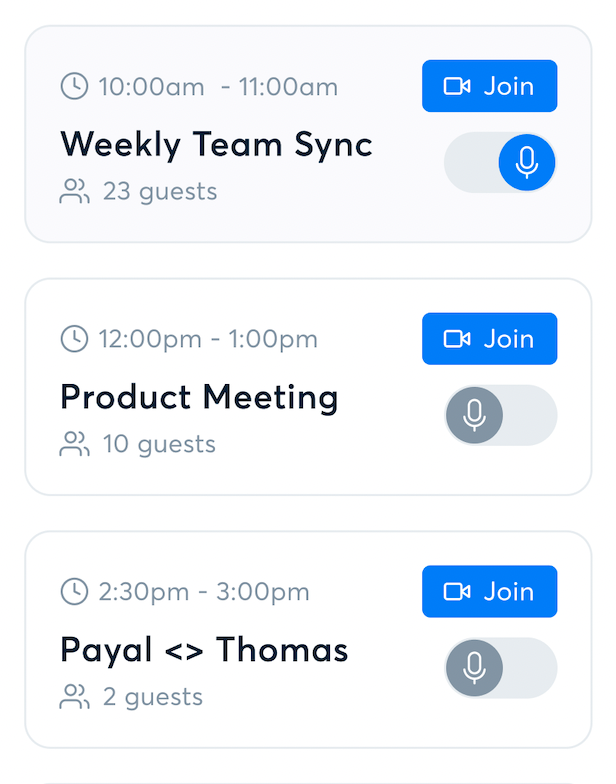
You can adjust the auto-join and sharing options of Otter Assistant for selected meetings individually in your Calendar.

Auto-join

You can adjust the Auto Join toggle for any meeting, overriding the defaults in Home Feed Settings.
Share

You can adjust the sharing options for any meeting, overriding the defaults in Settings. Mouse over a meeting and click the card.
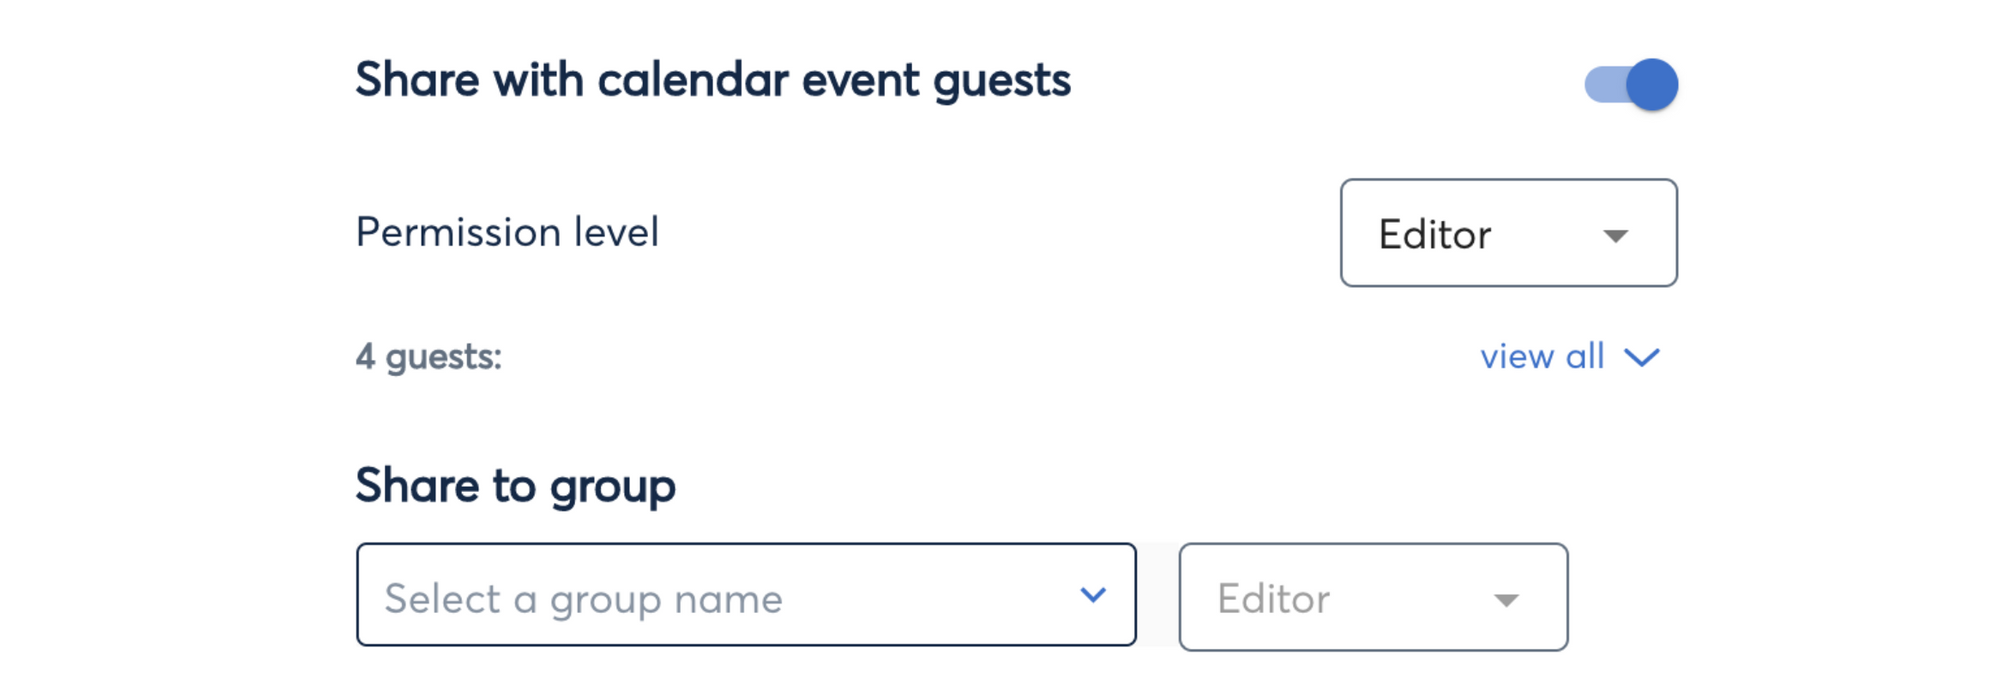
Share with calendar event guests
Turn on this toggle to share notes to all guests of this calendar event.

Share to group
Select an existing Otter group or create a new Otter group to share with.

How to Add an Otter Assistant to a Live Meeting?

For any meeting that is not in Calendar (e.g. an instant meeting that was not on your calendar), you can invite Otter Assistant to join this meeting on the fly.

Click the Add to live meeting button in Home Feed and paste the Zoom invite link (i.e. the full link including the ?pwd=...  portion at the end).

Otter Assistant with Zoom Breakout Rooms

You can also use Otter Assistant with Zoom breakout rooms. It can move between rooms but can only join one room at a time. The transcription from each breakout room is added to the same meeting notes link. To add Otter Assistant to a Zoom breakout room:

  1. Invite Otter Assistant to the Zoom meeting.
  2. After opening the breakout rooms, assign Otter Assistant to a specific breakout room as you would assign any other meeting participant.
  3. Otter Assistant will transcribe audio from the assigned breakout room only and you can move Otter Assistant between rooms.
  4. As soon as a breakout room closes, Otter Assistant will return to the main room.

Note: To use Otter Assistant with Zoom Breakout rooms, you need to be the meeting host.

Zoom Cloud Recordings Transcription via Zoom Sync

Otter.ai allows users to automatically sync their Zoom cloud recordings and transcribe them. As soon as your Zoom meetings end and the cloud recording has finished processing, the audio from the meeting is transcribed automatically and saved under My Conversations.

The zoom sync feature is currently available in the Otter.ai Business plan and works only for meetings that you are hosting.

Prerequisites

  • Zoom Pro plan (or higher)
  • Otter.ai Business plan

What is a Zoom Cloud Recording?

Zoom allows users with a Business or Education license to record meeting video and audio to the Zoom Cloud. From the Zoom Cloud, the recording file can be downloaded or streamed on the browser. After the meeting is over, a shareable link to the recording file is sent to the user's email that can be used to view, download, or share the recording with other team members. The recordings can also be viewed on the Zoom web portal.

Steps to Transcribe Zoom Cloud Recordings with Otter.ai

Step 1: Add Otter.ai Live Notes for Zoom at the Zoom Marketplace

To add Otter.ai Live Notes for Zoom, start by signing in to the Zoom marketplace as the administrator. Search for Otter.ai Live Notes for Zoom and click on the Visit Site to Add button and add Otter.ai to your Zoom marketplace.

Step 2: Connect Otter.ai to Zoom

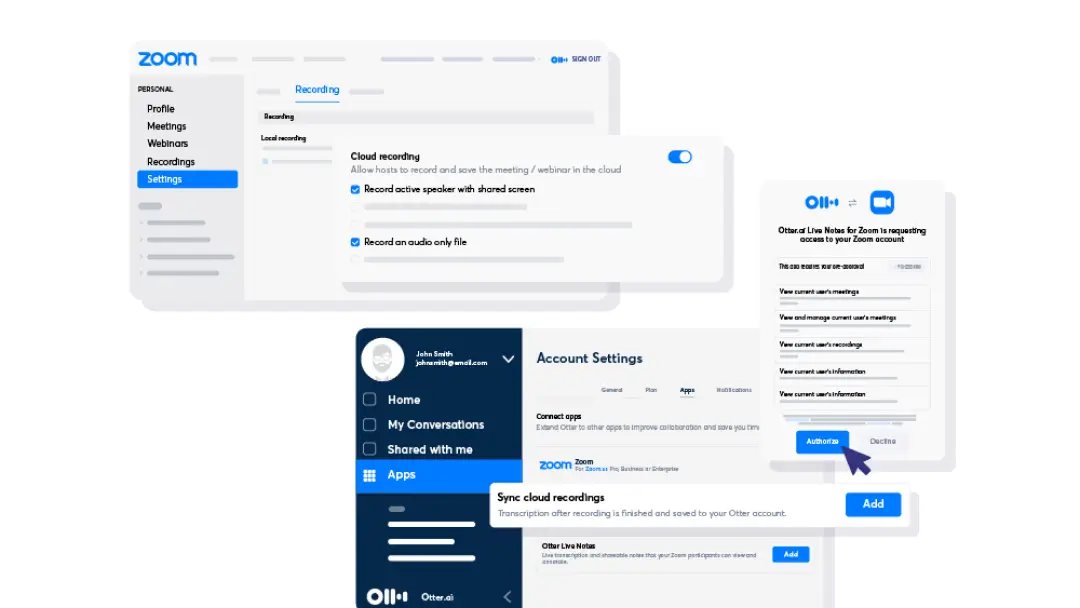
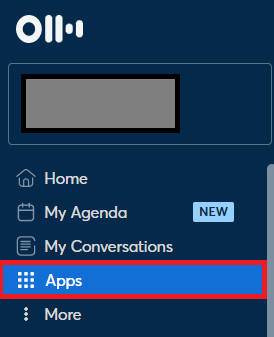
1. Log in to Otter.ai and click on Apps from the left panel.
2. Go Sync cloud recordings and click Add.

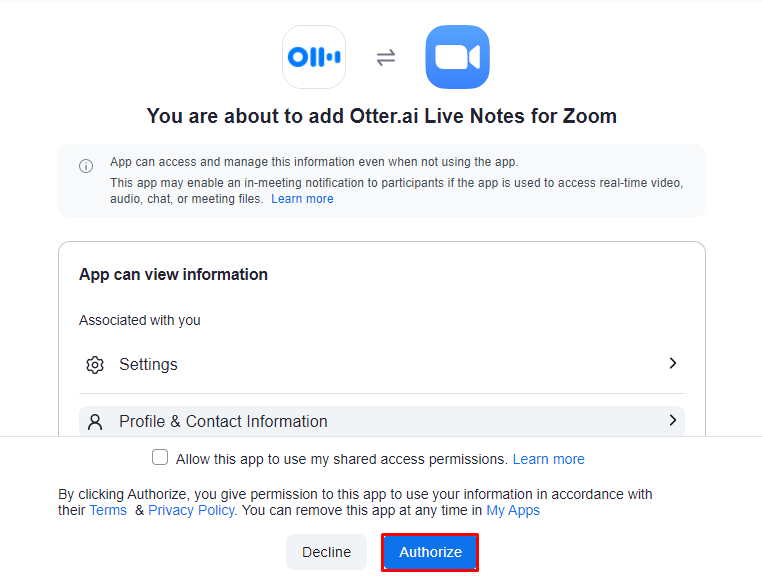
3. You will see a prompt to sign in to Zoom, click Authorize to connect.
4. Now, complete the configuration steps (from step 2) if you haven’t.

5. To test your integration, click Create Zoom Recording and record yourself for a few seconds.
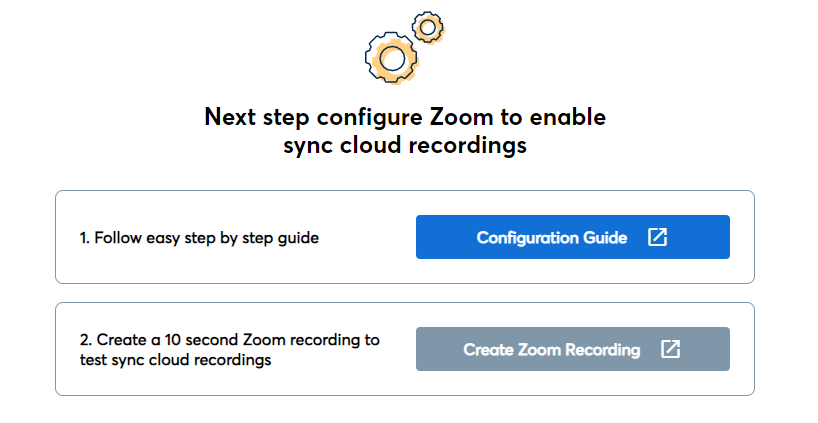
After connecting Otter.ai to Zoom, you should be able to sync and transcribe new cloud recordings. To download the Zoom recordings, import them into Otter.ai to transcribe.

Step 3: Enable Zoom Recording Download

Now, sign in to Zoom as administrator and go to Admin > Account Management > Account Settings > Recording to confirm the following settings:

  • Cloud recording: enable
  • Local recording: enable
  • Record an audio-only file: enable
  • Prevent hosts from accessing their cloud recordings: disable
  • Cloud recording downloads: enable
  • Only the host can download cloud recordings: disable
  • IP Address Access Control: disable
  • Only authenticated users can view cloud recordings: disable
  • Require password to access shared cloud recordings: disable

To enable Zoom recording download for a personal Zoom account, click on Settings > Recording, and confirm the following settings:

  • Cloud recording: toggled ON
  • Record an audio-only file: Checked
  • Allow Cloud Recording Sharing: toggled ON
  • IP Address Access Control: toggled Off
  • Require users to authenticate before viewing cloud recordings: toggled Off
  • Set Recordings as on-demand by default: toggled Off
  • Require password to access shared cloud recordings: toggled Off
  • Automatic recording: toggled ON (recommended)
  • Record in the cloud: selected (recommended)

Step 4: Download Zoom Recordings

1. Sign in to the Zoom web portal and go to Personal > Recordings from the left panel.
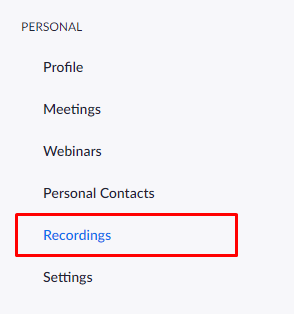
2. Now search for the recording you wish to download and open it.

3. Click the download icon next to Audio Only to download the file and save it on your computer.

Step 5: Import Zoom Recording Files into Otter.ai to Transcribe

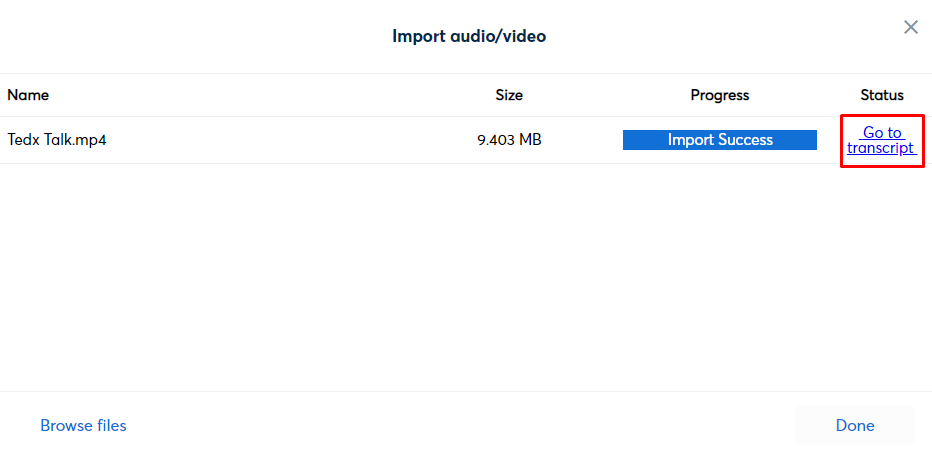
1. Sign in to Otter.ai and click on the Import button at the top-right corner.

2. Now, click on Browse files and select the file you wish to transcribe.

3. Zoom usually saves local recordings in the following folders (by default):

  • Windows: C:\Users\User Name\Documents\Zoom
  • macOS: :/Users/User Name/Documents/Zoom
  • Once imported, wait for Otter.ai to process the file, and then click on Go to transcript to open and edit the transcript.
Otter.ai Live Transcription with Zoom

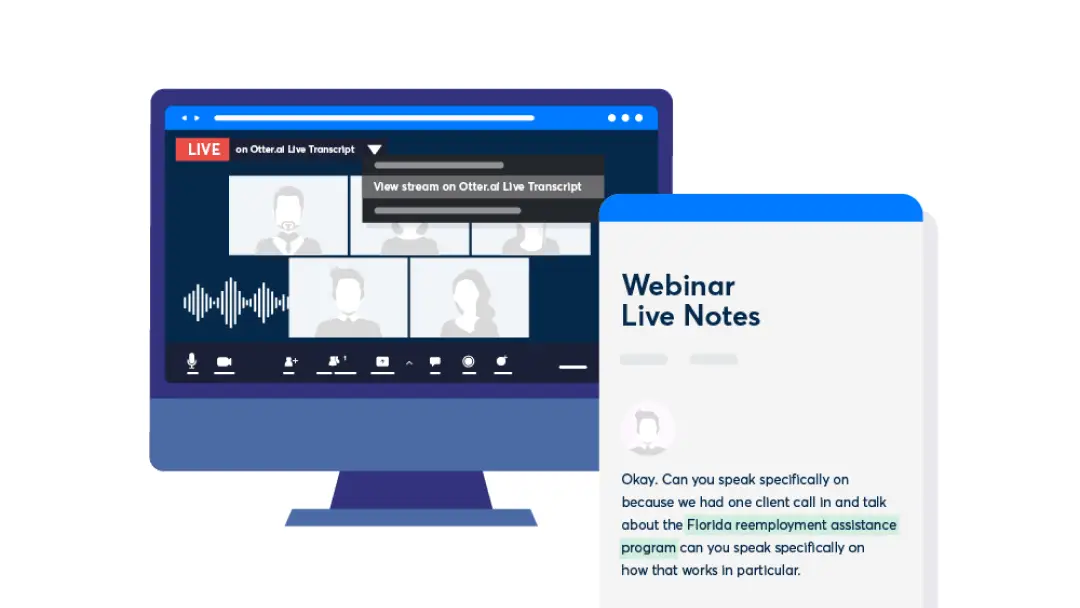
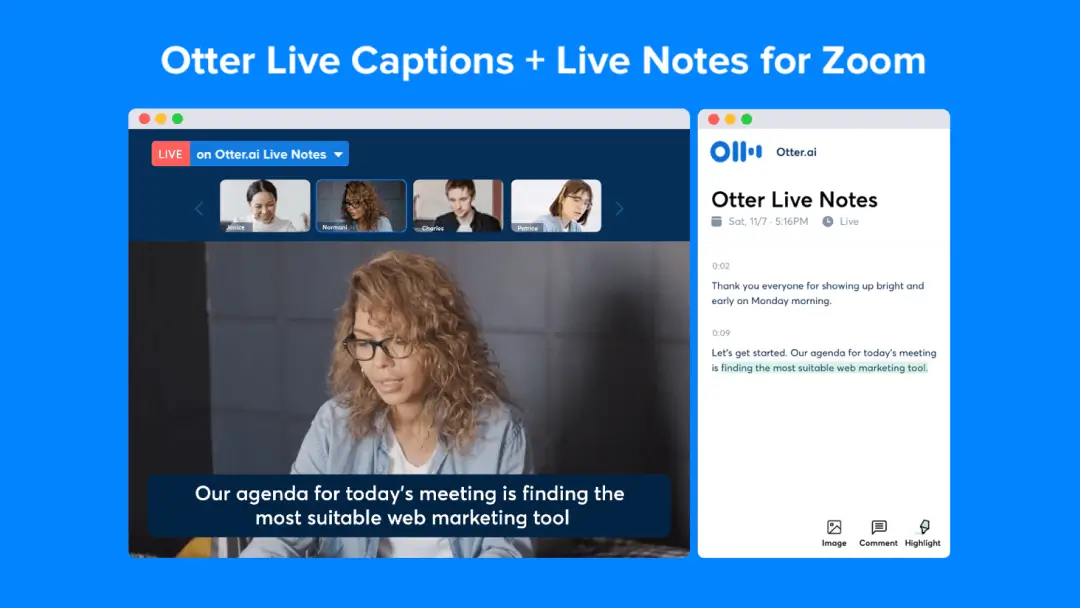
Otter Live Notes is an add-on for Zoom that allows users to enable live transcription for all participants and live note-taking for all collaborators. It opens as a web page that you can open side by side with Zoom or on another device.

Prerequisites

Otter Live Notes is a paid feature in the Otter.ai Business plan that requires the following:

  • Otter.ai Business plan
  • Zoom Business/Pro/Enterprise/Education

Users and their Capabilities in Otter Live Notes for Zoom

  • Meeting Host: automatically starts the live transcription.
  • Collaborators: take notes and collaborate.
  • Participants: access the live transcript.

Steps to Live Transcribe Zoom Meetings with Otter.ai

Step 1: Set up Otter.ai Live Notes for Zoom Administrator

1. Sign in to the Zoom Marketplace and search for Otter Live Notes for Zoom.
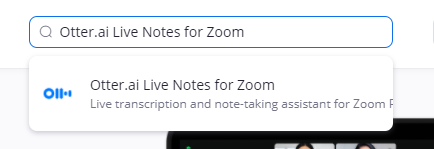
2. Click on the Visit Site to Add button to add Otter.ai Live Notes to Zoom.

Step 2: Allow Live Streaming in Zoom Web Portal

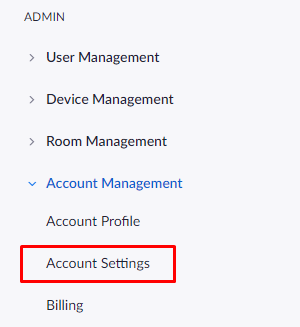
1. Sign in to the Zoom web portal and expand Admin > Account Management > Account Settings.
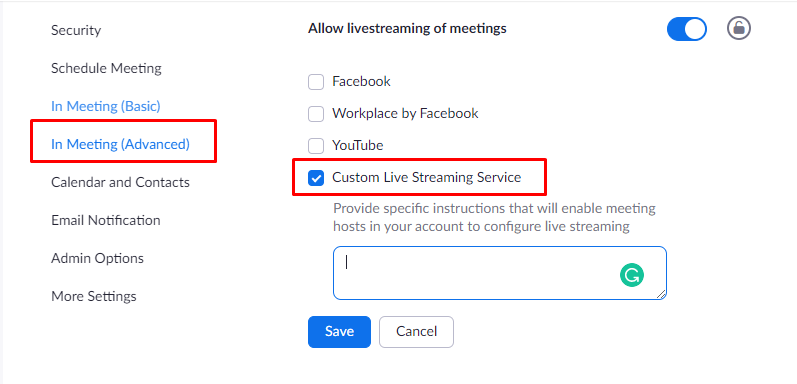
2. In the Meeting tab, select In Meeting (Advanced) from the left panel and enable the following settings:

  • Allows live streaming for meetings: enabled
  • Custom live streaming service: enabled
Step 3: Set up Otter Live Notes for Non-admin Zoom Host User

Allow Live Streaming in Zoom (Meeting Host)

  1. Sign in Zoom web portal as the meeting host.
  2. Open Settings, and configure the following settings in the Meeting tab:
  3. Allow live streaming for meetings: enabled
  4. Custom live streaming service: enabled

Step 4: Connect Otter.ai to Zoom

1. Log in to Otter.ai and open Apps from the left panel.

2. Find Otter Live Notes and click the Add button.
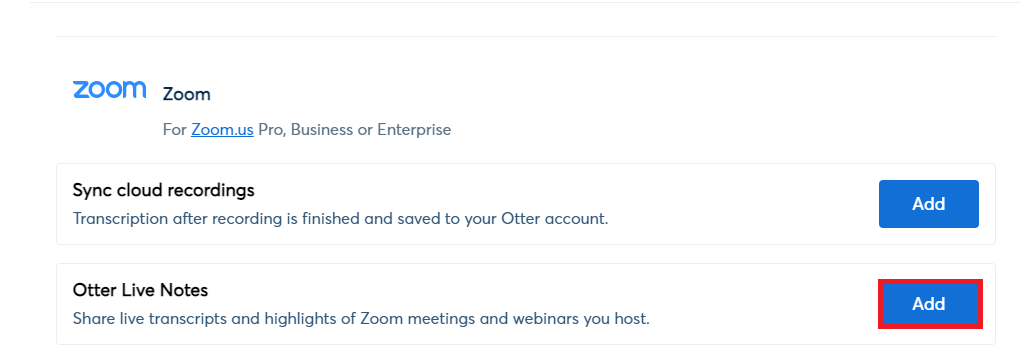
3. You will see a prompt to sign in to Zoom if you’re not already signed in.

4. To connect Otter.ai to Zoom, click on the Authorize button.

5. Complete all configuration steps from above, and then click on Test Configuration to verify Zoom settings.

Step 5: Automatically Start Live Transcription

With the Zoom account that is connected to your Otter.ai Business account, start a meeting. A red LIVE indicator on the top-left corner of the Zoom windows shows that  Otter.ai has automatically started transcribing the meeting.

Manually Stop Live Transcription: click on Otter.ai Live Transcript next to the red LIVE indicator and select Stop Live Stream from the dropdown.

Manually Restart Live Transcription: click on the More button at the bottom-right corner of the page, and select Live on Custom Live Streaming Service.

Step 6: Access Live Transcript

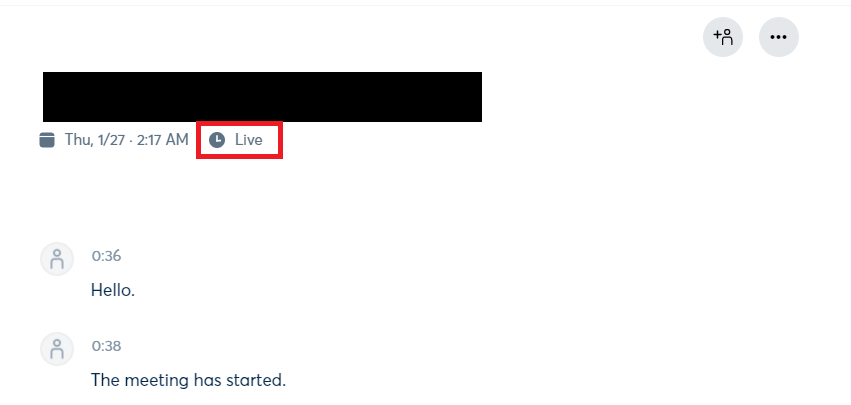
During the live Zoom meeting, participants can access the live interactive transcript directly and scroll back and forth to read at their own pace. To open the live transcript:

1. Join the Zoom meeting.

2. Click on Otter.ai Live Notes dropdown next to the red LIVE indicator and select View Stream on Otter.ai Live Notes.

3. The live transcript will open in another browser window.
Step 7: Collaborate over Live Notes

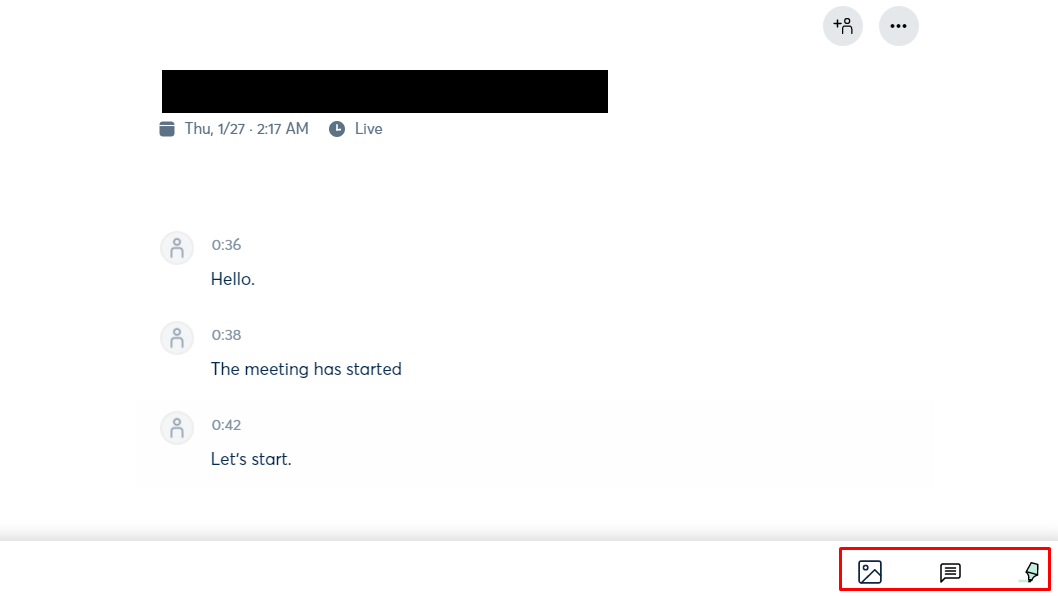
Collaborators such as the teacher’s assistant and meeting scribe can also collaborate over the notes by highlighting text, adding comments, and pictures. Later, the meeting notes can be reviewed and shared with everyone. Collaborators need to be logged into your Otter.ai account to edit the meeting notes.
How to Collaborate and Edit Your Zoom Meeting’s Transcript

Otter.ai allows users to edit their Zoom meeting transcript and collaborate with your team. You can edit any transcript by following the steps below:

1. Log in to Otter.ai.

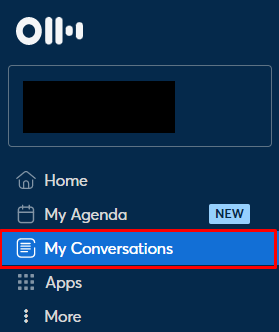
2. Click on My Conversations from the left panel.
3. From the list, click on the transcript that you want to edit.

4. Click on the Edit button on the top-right corner of the page, and start editing.

5. To share the transcript with other team members, click on the share icon on the top-right corner.

Why is it Important to Transcribe Your Zoom Meetings?

Zoom meetings are different from traditional face-to-face meetings in many ways. For starters, it lacks the human factor and eye contact that automatically comes with face-to-face meetings. On top of that, someone is always running into a connection issue and missing part of the conversation. Having a meeting transcript available at the end (or during the meeting) can make the conversation more accessible to everyone. The team can even review the transcript and explore the meeting points later on.

FAQs about Zoom Meetings Transcription

Can you get a transcript of a Zoom meeting?

Otter.ai offers users three ways to transcribe meetings:

  • Audio transcription for Zoom recordings.
  • Otter.ai live transcription which Zoom
  • Zoom meeting transcription via Otter assistant

You can also get a transcript of a Zoom meeting by uploading the recording file in MP3 or MP4 format and downloading the transcript within minutes.

How do I transcribe a Zoom meeting live?

Otter.ai offers three simple ways to transcribe a Zoom meeting live. Otter.ai Live transcription allows users to enable live transcription and live note-taking. Zoom cloud recordings with Otter.ai automatically sync and transcribe Zoom cloud recordings with Otter.ai. Finally, you can join any Zoom meeting to record, transcribe, and share meeting notes automatically with Otter Assistant for Zoom.

How to transcribe Zoom meetings for free?

You can transcribe a Zoom meeting for free by downloading the meeting audio and uploading it to Otter.ai. It will process and transcribe the audio recording within minutes for free. With the paid plans of Otter.ai, you can even transcribe MP4 files or transcribe Zoom meetings automatically.

Get started with Otter today.
You Might Be Interested In