How to Record a Webinar


In a world connected by virtual meetings and long-distance communication, web conferencing is an important tool. Whether you want to explain your company’s whitepaper in a live stream or make a conference video to share with your team members, there is a wide range of web conferencing tools to help you get the job done. However, live webinars can often feel limiting if you do not record the event before it ends. Therefore, regardless of the software or hardware you use, you will want to know how to record a webinar and save it for future use.
Zoom and Google Meet are two of the most popular webinar tools out there, as they are compatible with most operating systems and provide seamless, high-quality audio and video experiences. Moreover, both platforms make it easy to record a webinar video across many types of devices.
In today’s guide, we are going to look at how to record a webinar and how to get the most out of your web conferencing videos. But first, let’s look at a few of the primary reasons that people and businesses want to learn how to record a webinar in the first place.
Why Record a Webinar?
A web seminar (or webinar) gives you the ability to connect with your audience through live video conferencing platforms. However, most platforms (including Zoom and Google Meet) do not record a webinar video by default. Therefore, you could conduct or produce a great webinar, only to find that all of that content is lost once you end the video!
There are dozens of good reasons to record a live webinar, but here are a few of the most common and important motivations for recording your web seminar audio and/or video:
Create Pre-Recorded Content
Whether you are creating online courses or simply planning promotional material, creating pre-recorded webinars can help you show off some of the best things your business has to offer. While some webinars are produced off the cuff, most webinar hosts put a lot of time and effort into creating a quality presentation for their respective audiences. Therefore, it only makes sense to plan ahead of time to record your webinar and get the most out of your hard work.
Save Live Webinars
Webinars are, by default, live video conferences. This means that if you fail to record your video when the conference begins, you could lose access to some or all of your webinar’s content forever. So, even if you don’t intend to use your webinar video or audio for any specific purpose now, you can still record and store the content for later. You may want to review it for research purposes or just keep it in storage until you find a good use for it.
Share With Your Team Members
Due to their format as presentations or live meetings, webinars are often a treasure trove of useful information, particularly within a given organization. However, the fact that they are live events also means that some of your key team members may not be able to attend. If you fail to record the event, you won’t be able to share some or all of the insights gleaned from the webinar with absent team members. For this reason, planning ahead of time to record a webinar ensures that you can share it with any team members who may be absent or late to the event. Sharing past webinars can also be a useful training tool for team members who are new to your organization and aid in remote team communication.
Share With Your Clients
Finally, webinars offer a great way to show off your knowledge, products, services, or important data to clients. You may invite clients (or potential clients) to attend your webinar, but there is no guarantee that they will show up. Thus, recording the event ensures that you have useful information to show your clients at their convenience. Recorded webinars can be a great way to present a whitepaper, explain your company’s mission, talk about your products and services, or discuss your future endeavors. No matter what subjects your webinar covers, they can be a great tool for acquiring and maintaining clients for your business.
How to Record a Webinar
Now that we’ve covered some of the reasons to record a webinar, it is time to get down to the nuts and bolts of actually saving your multimedia files. We will primarily focus on the two most popular business webinar platforms, Zoom and Google Meet, though we will also cover some other popular video conferencing tools later on.
How to Record a Zoom Webinar
The process for recording a webinar on Zoom can vary slightly based on the type of device you use to host the event. Fortunately, the process is always the same if you are using the Mac or PC application, as you can easily record your meeting directly from the app’s built-in menu bar.
It’s important to note that, if you are not the host or creator of the video webinar, you will need permission from the host to start a new screen recording. Otherwise, you can just record your webinar from start to finish as the account administrator. In any case, here is the step-by-step guide to learn how to record a Zoom webinar:
On a Mac and PC
- Open the Zoom application.
- Start a “New Meeting” as the host.
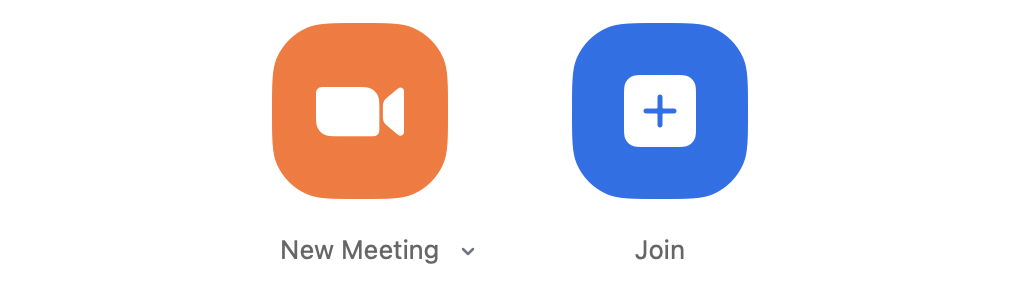
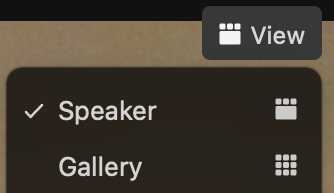
3. Before you begin recording, ensure that your screen reflects the image that you want to be recorded. For example, if you want the Active Speaker view (as opposed to Gallery View, shared screen, whole screen, etc), you will need to ensure that the Active Speaker view is selected. You can do this by clicking on “View” in the upper right-hand corner of your screen and choosing your preferred view.
4. When you are ready to begin recording, hover over the screen with your icon and click the Record button from the menu that appears at the bottom of your screen.

5. The recording will begin immediately, with the option to either pause or stop the recording available on the same menu.

6. Once you choose to end the meeting or end the recording, Zoom will automatically convert the recording and save it to your files. (Note: if you’re having trouble finding the file on your computer, a Zoom video (MP4 file) will typically be saved as Zoom_0.mp4 by default, while the audio-only (M4A file) will be saved as audio_only.m4a.
On a Mobile Device
If you want to record a webinar from your mobile device, you will need to have a paid Pro, Business, or Enterprise account. Basic (free) users cannot record from mobile Android or iOS devices. That said, the process for recording a Zoom webinar on mobile devices is essentially the same for both iOS and Android. Simply follow these steps to record a Zoom webinar on your phone or tablet:
- Open the Zoom application.
- Start a “New Meeting” as the host.
- Click on “More.”
- Select “Record” (Android) or “Record to the Cloud” (iOS).
- You can pause or stop recording from the same tab.
- Once you are done recording, the recorded file will appear under “Recordings” in the Zoom web portal. From there, you can download the files to your local disk.
Again, if you only have a free Zoom account, you will not have the option to record a webinar from your mobile device.
How to Record a Google Meet Webinar
Like Zoom, Google Meet makes it easy to record a webinar just as you would any other type of Google Meet call.
On a Mac, PC, or Mobile Device
- Create a Google Meet from your Google Account homepage, the Google Meet app, or at meet.google.com in your web browser.

2. Click on Activities > Recording > Start Recording > Start.
3. You can choose to end the recording at any time by stopping the local recording via the same menu or ending the entire webinar.
4. Google Meet recordings are saved in My Drive under the “My Recordings” folder.
How to Record a Webinar With Multiple People
Typically, figuring out how to record a webinar works the same whether you are doing a pre-recorded video by yourself or a live webinar with multiple people. However, when other participants are involved, they will be informed that the meeting is being recorded. While Zoom does not require participants to grant their permission before starting a webinar recording, Google Meet does. Therefore, it is best to inform participants of your intent to record before the webinar begins, regardless of the platform you use.
How to Record a Webinar On Other Platforms
Needless to say, Zoom and Google Meet are not the only web conferencing platforms that allow you to record a webinar. So, here are a few useful resources if you need to learn how to record a webinar using other popular services:
- How to record a webinar on Microsoft Teams
- How to record a webinar on Skype For Business
- How to record a webinar on GoToMeeting
How to Promote a Webinar
Unless you plan on making a pre-recorded webinar by yourself or with your team members, you will likely want to attract an audience for your virtual live event. After all, the more people who attend your webinar, the more people can participate and glean useful information from the experience. Moreover, it can help make your organization look better if your attendance rate is high.
Fortunately, there are various ways to promote your webinar in the days, weeks, or even months leading up to the event:
Webinar Promotion Services
Promotion Methods Before a Webinar
- Email campaign - Send out emails at set intervals (one week before, one day before, one hour before, etc) to keep potential participants informed about your webinar event.
- Blog Posts - Create one or more blog posts to let people know exactly what your webinar will cover and how they can access it.
- Automated Registration Form - Prompt visitors of your business site or blog to sign up for the webinar in advance through an automated registration form.
- Social Media - Promote your webinar event through your business page or via paid social media advertisements (Facebook, Twitter, etc).
Promotion Methods After a Webinar
- Email campaign - Send out emails with links to access the recorded webinar after the event has finished.
- Landing Page - Create a landing page on your website that provides links or information to help visitors access previous webinars.
- Youtube - Upload your recorded webinar videos to your Youtube page to help reach a larger audience.
- LinkedIn - While LinkedIn is a great social media platform for sharing information about your events in advance, it is also great for resharing past webinars to people who have a connection to your business.
Enhancing Your Webinar Recording With Transcription and Captions
Now that you know how to promote and record a webinar, it is time to look at one of the best ways to enhance your final video content: audio transcription and captions.
Benefits of Webinar Transcription
- Make individual segments or pieces of content within a long webinar searchable by keyword or phrase.
- Ensure that your webinar is organized and digestible when used in meetings or presentations.
- Make your webinar easier to find on Google and other search engines through SEO keywords related to the topic(s).
Benefits of Webinar Captions
- Offer a proven way to help users or attendees absorb and retain more of the information presented in your webinar.
- Make webinar videos and audio files more accessible to the hearing impaired.
- Provide captions during your webinar for viewers who prefer to take in information through written words.
How to Add Transcription and Captions With Otter
As you can see, both transcription and captions can work to enhance your webinars, make your organization more inclusive, and get your message in front of a larger audience. Fortunately, Otter.ai makes it easy to add live transcriptions and captions to your webinars, edit the scripts during or after your webinar, and offer a better viewing experience whenever you share your recorded webinar videos. This way, you can get the most out of every webinar recording you create.
Do you want to learn more about how to record a webinar and create high-quality content for your team or clients? Would you like to find out more about the perks of Otter.ai live transcriptions and captions? Contact Otter.ai today for more information!
Related posts